how to

Screen Printing 101: Techniques

IMG_4835.jpg

So you’re wondering what it would take for you to be able to make your own print? or you’re wondering how Family Industries makes perfect prints? We’ll take you through the steps necessary to achieve a flawless screen print as well as show you how we do it at the Family Industries HQ.

In this article, we will also take you through the different techniques used for specific outcomes and all that will be necessary for you to achieve them which would include equipment and other factors such as time and effort.

How To Get Started

We’ll take you through the fundamental tools you will need to begin this process. Although you can buy ready-to-use kits from websites such as screenprinting.com - you can always find DIY ways to make your own setup.

Check out Create Custom Screen Printing Designs at Home

43429-group3ww-l.jpg

The Screen

Choosing the right screen mesh can be confusing, a 110 to 160 mesh count screen is the most versatile and the most commonly used in screen printing. We recommend that for prints that are up to 3 colors a 160 (61cm) to 180 (70cm) monofilament mesh screen is best, ensure that they have very well made wood frames that have been purchased with the fabric or mesh already attached (pre-stretched) OR you may also use a metal retentionable screen.
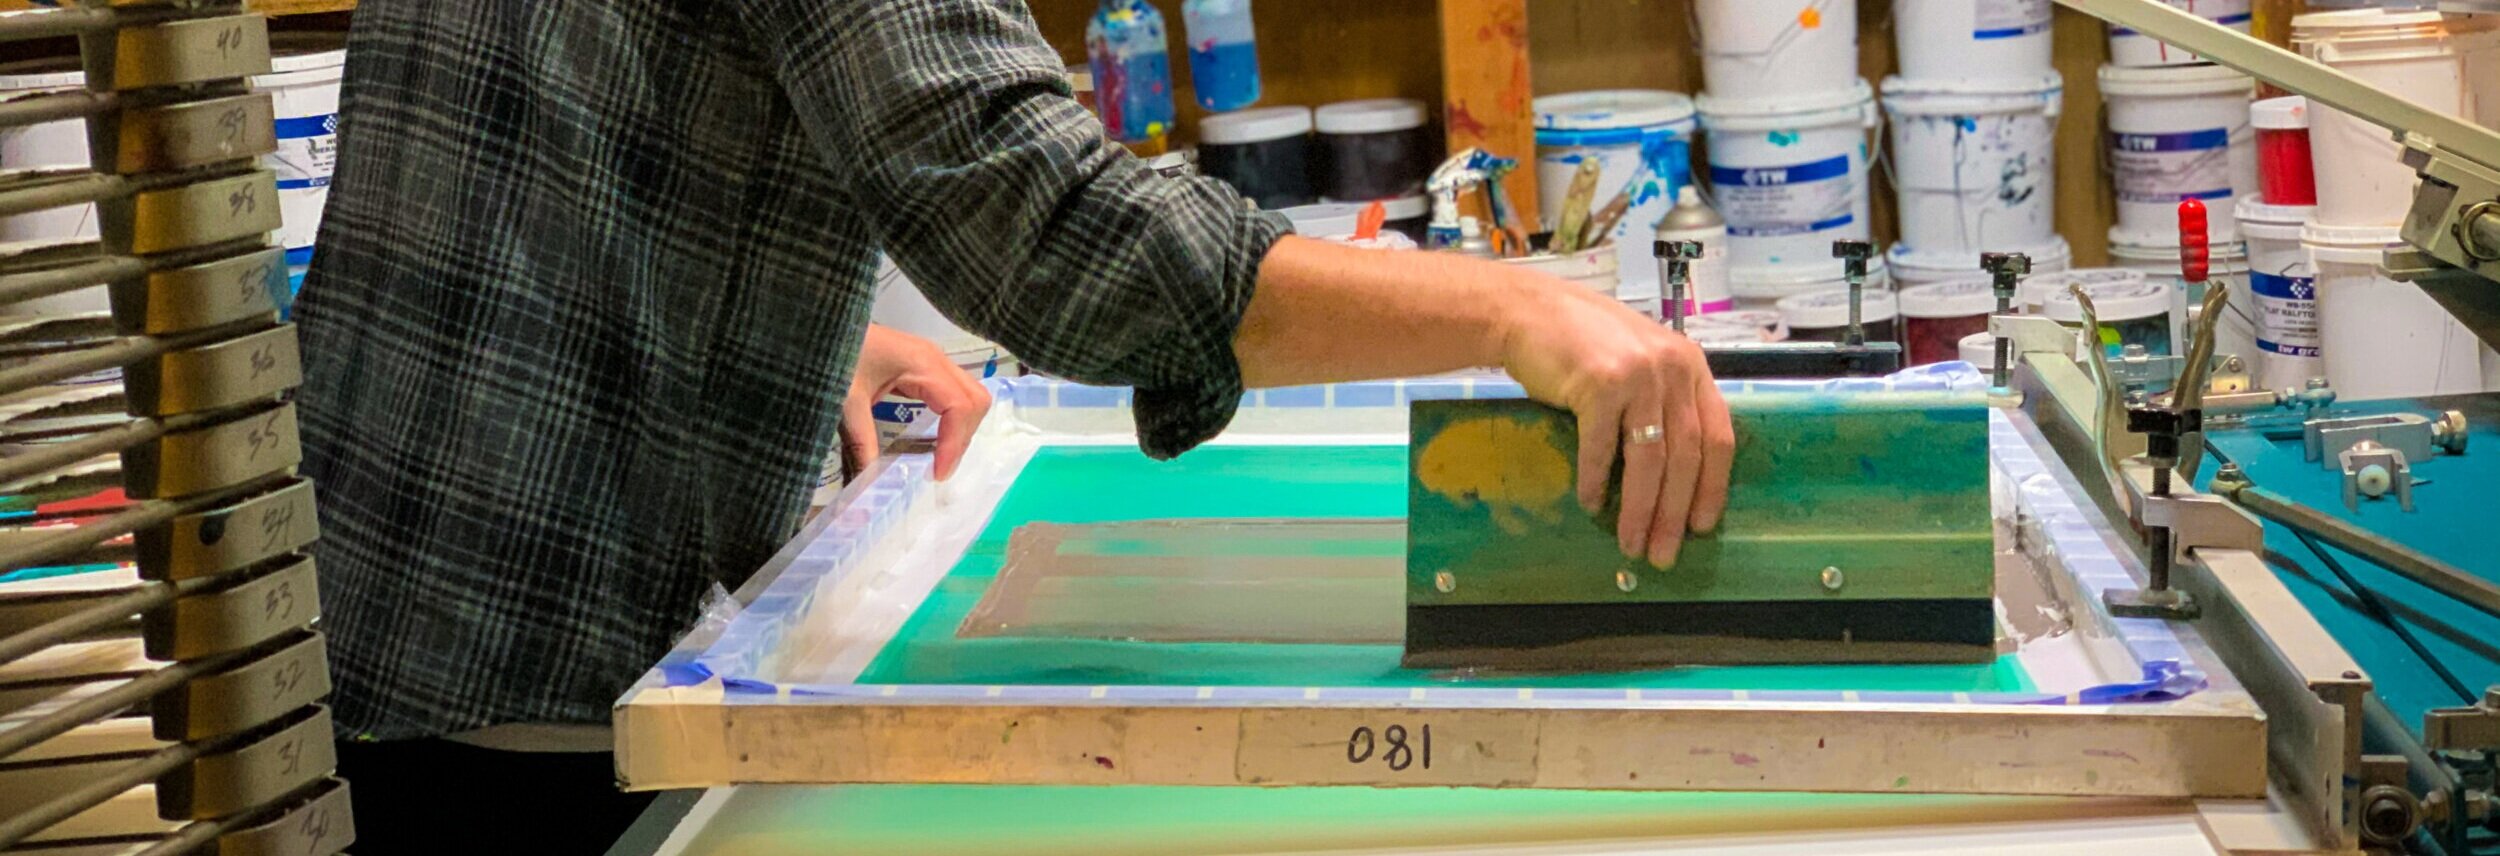
Here’s how to make your own screen

press-starter-blue-1-xl_1_500x500.jpg

The Press Set-Up

The screen needs to be placed on the press and squared to the shirt board. This is as simple as placing a t-square under the frame and looking through the screen to square the image on the frame to the edge of the board. Now when you make a print it will be straight to the board.


green-galaxy-cryocoat-gal-min-xl_1_500x500.jpg

Emulsion

A big part of the photostencil phase of the production cycle, screen printing emulsion is the light-sensitive liquid or capillary-direct films that you coat or adhere to the degreased screen fabric prior to taping your film positives in place.

There are a few choices to pick from when it comes to getting the right emulsion and it has to do with certain variables. Learn about what type of emulsion you will need according to your setup and experience level.

printing-ink-500x500.jpg

The Ink

Most inks on the market are too thick to print easily by hand and they generally need a slight amount of reduction – or thinning – to make it work better. Thinning does not mean making it softer it means adding a curable reducer rather than a "soft hand" additive. A small amount of reducer will make the ink more workable.

If your print is a three-color print, it is recommended to thin the lightest colors a little more than the darker colors. This will generally be the first color in your print and it needs to penetrate into the garment more than the others, this way, it will not pick it up on the bottoms of the other screens. If black is your last color, you can thin it less. It needs to lay on top of the other colors and it will blend in with the under colors if it is too thin.

Plastisol ink tends to get a little thicker when it isn't in use, so you should always stir the ink before you begin thinning it. By stirring the ink you will find out if it really needs thinner. We recommend an ink that is smooth and creamy to one that is so thick that you break the stick trying to stir it.
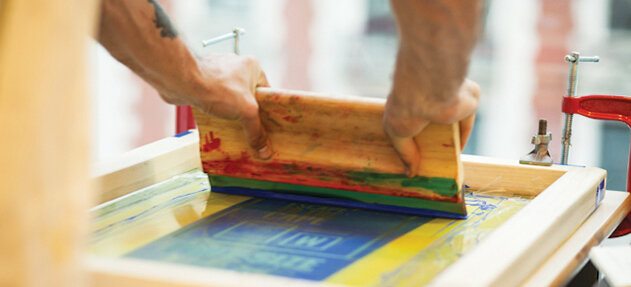
Beta-Chemical-Screen-Squeegee.jpg

The Squeegee

We highly recommend a triple durometer squeegee that has a harder center around a softer outer edge. These give you more control, especially if you have a lot of strength and try to flatten the blade as you make the print (you don't want to flatten the blade). You can also pick up an "old-fashioned" medium hardness blade with a sharp edge and make a great print. A sharp edge shears off the ink cleanly and will make a sharper print than a dull edge blade. If you are a messy printer, you should use the wider 5" handles. These will help keep your fingers out of the ink.

Choose the right squeegee for your screen print job

Techniques

There are technical applications we recommend and we’ll go over details as to how to print once you have your equipment all set up and ready to go.

IMG_6712.jpg

How Much Ink Should I Use?

Depending on how you work, knowing how much ink to use takes time and practice. Some people have a heavy pour but they are able to manage the printing process to avoid making a mess, while others tend to be a little less coordinated. The rule of thumb is to pour enough to get a good amount of prints without running dry, but not so much that when you print it all rides up onto the squeegee handle. It is much easier to put more ink on a screen and harder to take the excess out! Start off with a small amount and work your way up to learning how much is really needed and how much you can handle.

How Do I Hold The Squeegee?

Top Grip:

A lot of printers use the standard “two-hand, top grip and pull towards you” stroke. While this works well, it can cause some problems if you are printing all day long. Not only will the tips of your fingers and thumbs be sore (and may become numb) you may also feel tenderness in your wrists. What this could cause is a repetitive motion disorder known as Carpal Tunnel Syndrome.

Some people can print their whole lives and never get this but to minimize the chances of developing Carpal Tunnel, you can use special ergonomic squeegees that force you to hold a wider handle.

Side Grip:

This technique moves the strain from the center of your wrist to your forearm muscles. Simply hold the squeegee by the side and pull it towards you. This works great if you are a short person or of average height.

Push or Pull?

The answer to this question is based on preference. Pulling the squeegee towards you is the standard method, but pushing it away from you is really a lot easier. When pulling the squeegee you use more of your wrists and shoulder muscles. When pushing, you use more of your body weight to push the squeegee. We encourage you to try both and figure out what is most comfortable.

How Many Strokes Are Needed?

You really only need one stroke if your ink is diluted enough and you’re printing on a lighter fabric. If the fabric is dark and your ink isn’t sticking as well as you’d like, we encourage you to do two-stroke. If you find that two or three strokes are not doing the job, it may be that your ink is too thick and will need to be diluted a bit more.

How Much Pressure Do I Apply?

We recommend that not a lot of pressure is applied as this can cause the print to be uneven, if the ink is the right consistency then a medium amount of pressure should do the job.


In Conclusion

Having the right equipment is more than half of the job - buying the equipment and the ink can get expensive, however, if you have a plan and the right design, you can make up the money quickly and begin to profit from your creations.

Practise makes perfect, many techniques can be mastered by just making mistakes and starting over. So, don’t be scared to make errors and having to start over, it’s all part of the process.

Author: Irene Floridia - Content Creator


Follow us on Instagram and Facebook!

For FAQ, check out our site!

For any inquiries, send us a message!

OR

send us an e-mail at quotes@familyindustriesla.com

Our showroom at 2755 Fruitdale Street, Los Angeles, CA 90039 is open by appointment only from 10 am - 4 pm Monday through Friday.

Guide To Product Packaging and Labeling

unsplash-image-W-CN4ZWwKiY.jpg

Consumerism is at its all-time high, standing out in a million other products similar to yours can be a real struggle. Now more than ever, brands are valuing their packaging and labeling a lot more than they did before. If you’re not pushing boundaries with the artwork and design of your product and packaging, take this as a sign to up your game and re-evaluate your approach. In this article, we’ll go over the steps you need to follow to create an eye-catching product label and package.

Product Packaging

unsplash-image-HoTdcmEB-b8.jpg

We don’t often consider package design as a difficult creative job. Well, you might be surprised to learn that it does take quite a bit of effort! Blending colors, icons, logos, illustrations, and text on the bag to draw people’s attention is the job of a package designer. Beyond design, you also have a wide array of choices in packaging materials, such as folding carton boxes, plastic, fabric, and more.

There are three questions you must have the answer to before you start designing the packaging for a product.

Product Packaging: How Top Brands Design Memorable Unboxing Experiences to Delight Their Customers

What Is The Product?

This question may seem very basic but it’s crucial to help you determine if there are any logistical musts for your product packaging. For example, a delicate product may require more secure packaging like packing peanuts or a sturdy box. Something that is large or with odd dimensions, on the other hand, may require a custom packaging solution instead of a box, such as a fabric bag or aluminum can.

Read How to Package Odd-Shaped/Sized Objects for Shipping?

Who’s Your Customer?

The type of packaging is often dictated by who your buyer/customer is. Is the product supposed to be used by men, women, or both? Is it for children or adults? Is it geared towards people who are environmentally conscious? To those on a budget or with lots of disposable income?

Read The Effect of Versioned Packaging on Various Demographics

By answering these questions in preparation to design your packaging, you’re narrowing down things like the materials, colors, and overall design. Products for older adults may need larger text. Alternatively, items geared towards an affluent customer will need to consider materials that create a feeling of luxury.

How Are People Buying Your Product?

Is your product easily accessible? Are people exposed to your product at a supermarket, a boutique, or online?
You’re going to want to think about packaging differently if the product is going to be sold online and shipped than if it’s going to need to stand out from the competition on a big-box store shelf.

Read 10 Ways To Make Your Product Stand Out On The Shelf

If the product is being sold online, perhaps a box in which the item will be rattled or easily damaged while in transit may be a bad idea. If you’re limited on your budget, packing peanuts or wrapping the item in bubble wrap is a good alternative to other expensive materials. Those that will be on a boutique shelf will need to catch the eye of a buyer surrounded by cutesy items in cutesy packages.

Order your own branded packing and packing promotional items

unsplash-image-3IkH9VN3QT8.jpg


Pro Tip: If printing on packaging is out of your budget, consider custom tape to use on blank boxes (applicable for online retailers) and/or stickers with your logo!


unsplash-image-bVYAaPmadAI.jpg

Product Labeling

Product labeling is a part of the packaging of a product. Labeling is the written information on the packages. These written labels on the package cover important information which needs to be communicated to a customer. Product labeling is different from packaging. A product packaging might have the brand colors, the logo, and the material as well as the shape of the package, etc.

These are some of the technical details you should be considering when designing your labels.

Digital Printing: A Packaging Revolution

Colors

Following the advice above, if your product will be sold in stores then you want to use colors that will stand out and will make a statement. Additionally, when branding, you should stick to a color pallet of at least 3 colors and follow that throughout your labels and packaging. You will also need to have the CMYK values or Pantone Matching Values (PMS) colors for printing.

Read Psychology of Colour – How To Use It In Your Packaging Design

Fonts

The font should be legible and easy to follow throughout the label. Make sure it doesn’t clash with your logo if your logo is a typeface. Ensuring the font is the right size for the size of the product is also important, and you want to make sure that you have the rights to the font to avoid any legal issues.

Check Out How to Choose Brand Fonts for Packaging Design

Logo

Having your logo on the label is key, make sure it’s centered and represents your brand colors and aesthetics. For a smooth printing process, make sure your logo is a vector file.


Conclusion

It’s advised to spend a good amount of time thinking about your packaging, more often than not, people chose the product that looks cool and interesting, especially on a shelf with other competition. Be strategic about choosing your colors, fonts, and artwork. It’s best to work with a designer that can execute the artwork and placement of your label, logo, and other necessary product information.

If your budget does not allow for hiring a designer, or if you’re product is sold online, for packaging we recommend getting branded packing tape, stickers, and stamps of your logo to easily brand your packaging on a budget. You can have stickers, pins, and other promo items printed by your local print shop.

Author: Irene Floridia - Content Creator


Follow us on Instagram and Facebook!

For FAQ, check out our site!

For any inquiries, send us a message!

OR

send us an e-mail at quotes@familyindustriesla.com

DIY Screen Printing on a Budget

Screenrpint.jpg

So you have a great design and you want to make t-shirts but you’re on a budget and can’t afford a minimum order from a local screen printer? Well, you can get your own setup on a limited budget and we’ll show you how. In this article, we will take you through the essential materials and how to outsource some of those expensive items.

Screen Printing: The Essentials

These are the materials you will need to have a basic setup, later on, we will give you resources on how to either make your own, where to find a good deal, or best practices on how to waste less to get more.

  1. Screen - The screen has a mesh, which is the fabric stretched over the screen’s frame, and is a weave that has tiny holes in it, which allows the emulsion to harden and adhere to it, and also allows ink to pass through the mesh that is open, IE the stencil. The common sizes are 18″x20″, 20″x24″, and 24″x31″, but there are companies willing to make screens to any size needed.

  2. Press - The press holds the screen in place between prints, making it easier for the user to swap out the paper or clothing being printed.

    Learn more about Choosing the Right Screen Printing Press

  3. Photo Emulsion - This is a thick liquid substance that reacts to light. Essentially, emulsion becomes "tougher" when exposed to light, making it more difficult to remove from surfaces. The emulsion is applied to the screen, at least one layer on both sides, using a scoop coater.

  4. Stencil - Stencils are basically opaque sheets, similar to transparency sheets, that the designs are printed onto using a laser printer. The design needs to be as dark as possible so that it blocks UV light from the exposure unit to the areas behind the design. Learn How To Screen Print with Stencils

  5. Ink - We recommend using water-based ink to have the best result. Water-based ink is friendly to the environment, stays longer wet on the screen, and requires little chemicals for cleaning. This ink requires technical expertise. Another option is plastisol based Ink. This ink was the most common choice for a long time because water-based ink is more difficult to use, therefore requiring printing expertise.

  6. Squeegee - A squeegee is a rubber blade attached to a long wooden, metal, or plastic handle. It’s used to push the ink through the mesh screen and onto the surface being printed.

  7. Darkroom Light - For this process, you will need a darkroom to be able to apply and mix your emulsion. A darkroom-safe light is necessary to be able to see while you’re preparing the screen.

  8. Exposure Light - After coating your screen with emulsion, it’s time to place your stencil on it and expose your design using an exposure light.

Check out The Art Of Making: Hand-Screen Printing


But How Do I Print on a Budget?

IMG_7366+2.jpg

We get it, the materials list is long and it’s not looking cheap! - Don’t worry, we got you! Here’s how you can cut costs on your materials.

Tip: You can almost always find some of the materials listed above on websites such as Craigslist, OfferUp, or Facebook Marketplace. This is a good way to get exactly what you need without paying full price.

Screen

With the price of lumber being low, building your own frame can be cost-effective, although screens are fairly affordable. Screens for screen printing range in price from $20 to $35 dollars, however, if you are making a print requiring more than one screen, this can get pricey. We recommend that if you’re just starting to only get one screen and begin printing single color prints.

Screen Printing Press

A press is the most expensive part of this process, it can run you anywhere from $100 to $1,200 dollars but you don’t have to have a press. Many printers have simply used a screen on a table and applied pressure with one hand while printing using a squeegee with the other. The trick is to make sure the t-shirt is placed always in the same spot.

Now, if you’re doing a large print and it requires a little more concentration, we suggest you set up on a table that you don’t mind drilling a hole into, and add door hinges to your screen and the table - this will prevent your screen from moving and you can use both hands while printing.

Ink

Inks can get pricey, but as we recommended, you can find this on Apps like OfferUp or Facebook Marketplace. Otherwise, a way to conserve ink is to minimize your use by pouring smaller amounts when printing and keep pouring as you go. This practice will prevent you from wasting ink.

Learn about What is the Best Ink for Screen Printing

Squeegee

Squeegees are very affordable and you can find a whole kit for less than $10 dollars if you buy directly from a wholesaler.

Darkroom Lighting and Exposure Light

The best way to work with the photo emulsion is in safelight conditions. A darkroom safe light lets you work with the photo emulsion in safelight conditions so that you can see what you’re doing when mixing the emulsion and coating the screen without exposing it to UV light. Because film photography is not as popular anymore, you can find a lot of Darkroom-safe lights on websites such as eBay for $20 dollars.

For exposure lights, you can go to your local hardware supply store and find 500-watt or higher halogen work-lights anywhere from $20 - $40 dollars. They generally have a black housing and clear glass lens at the front with a wire grill covering it. Start by removing the grill and glass from the front. It is a UV filter and when you expose your artwork to your screen you will want maximum UV exposure. This is a great alternative DIY exposure setup.

For a more in-depth list of screen printing materials, check out What is Screen-Printing and What Materials Do I Need?

Author: Irene Floridia - Content Creator


Follow us on Instagram and Facebook!

For FAQ, check out our site!

For any inquiries, send us a message!

OR

send us an e-mail at quotes@familyindustriesla.com

Our showroom at 2755 Fruitdale Street, Los Angeles, CA 90039 is open by appointment only from 10 am - 4 pm Monday through Friday.

Screen Printing With Puff Ink

s307002564771447779_p37_i3_w1080.jpeg

If you’ve been paying attention you’ve seen that more and more streetwear brands are bringing back the Puff Ink prints. This type of ink is a plastisol based ink that has been modified with the addition of a heat reactive foaming agent that makes the ink expand tp give you that ‘Puffy’ look.


How Does It Work?

IMG_5924.jpeg

Puff ink adds a 3 dimensional aspect to screen printing on garments. With this type of ink, you will follow the same screen printing steps as printing with standard water-based inks.

You can use puff ink across the entire artwork, or you can choose specific elements or colors of the design to give it the desired effect to bring more attention or 'pop' to a particular part of the artwork.

One of the downsides to printing with puff ink is that it’s hard to match the exact Pantone ink colors as opposed to using regular water-based ink. This is because the puff ink additive changes different colors in different ways. However, usually, lighter Pantone colors are easier to match than darker colors.

Keep It Simple

There are no fundamental limitations when using puff ink for t shirt printing, apart from when your design has small details that are less than 1 - 2mm wide. For the best puff print, you will want your design to have thick lines and minimal small details. When creating a design featuring text, choosing the right font is key. The thicker the lines the more your design will stand out.

Check out How To Add Puff Additive To Plastisol Ink

How It’s Made

You should use plastisol inks of any color and add a puff additive such as “Rutland NPT puff’ which recommends a 5% to 15% ratio for an optimum puff. The amount of additive dictates how much the ink will rise. With puff ink, it’s important to measure how much additive and paint to mix by weight.

When it comes to your screen, the lower the mesh count, the more open the holes are, which translates to more ink deposit and results in a more “puffy” print.

Once you’ve added the ink to your garment in the chosen design, as the ink goes through the dryer and the heat rises, so does your ink. Like a loaf of bread!

Aftercare

To preserve a puff print or any other specialty prints, it is recommended that you wash it inside out with cold water. Do not use a tumble-dryer, hang dry if possible and do not iron over the print.

Check out Puff Ink – The definitive designers guide for apparel creation


Pro’s and Con’s List

IMG_5980.jpeg

Pros of Puff Screen Printing

  • Fast printing technique for printing in large volumes

  • Can be printed in conjunction with a wide selection of other inks and effects

  • Can produce designs with multiple colors

  • High-durability, will not crumble and flake off

  • Professional finish and usually less expensive (consult with your printer)

  • Can print on most types of fabrics

Cons of Puff Screen Printing

  • Initial setup fee makes it unsuitable for small quantity orders

  • Not good for use in fine detailed artwork

  • Can not be used for image (raster based) prints

  • Can not be printed alongside, foil, flock or high density print effects


Are you looking to printing

your design with Puff Ink?


Get the inside scoop from Lee Stuart printing with Puff Ink for the first time!


Brand Spotlight

Japangeles is a Los Angeles based streetwear brand located in the heart of Little Tokyo. Japangeles has done collaborations with other major brands such as Kirin, Hello Kitty, Champion, and Lexus. Their simplistic yet eye-catching approach to design and word play has caught the attention of many people looking for high-quality garments and minimalistic aesthetics in Los Angeles. Their newest design features a puff ink print, demonstrating the current popularity of this type of specialty print method.

Author: Irene Floridia - Content Creator


Follow us on Instagram and Facebook!

For FAQ, check out our site!

For any inquiries, send us a message!

OR

send us an e-mail at quotes@familyindustriesla.com

A Guide To Creating Your Own Merch

IMG_1373.jpeg

Creating a brand is a way to develop your unique business personality, connect with the consumer and establish yourself within the corporate market. Once you have solidified your brand, the next step can be creating merchandise that is exciting and viable to market to new or existing customers.

IMG_4328.jpg

Some businesses may appear more suited for merch than others. For example, creative businesses or businesses that deal in similar merchandise may seem more well-placed to sell custom promotional products on the frontlines. However, the truth is that all businesses can benefit from creating merch for their own brand, no matter the product or service.

Creating merchandise for your own brand can give you the freedom to sell and use swag as custom products for any service. It’s a great and creative way to get your brand design out in front of other people and make some extra income while doing so.


Conversation is not simply a two-way process, but also a continuous process. Brand research enables brands to ask the questions and listen to their customers, allowing them to keep their finger on the pulse and adapt appropriately.

Research

unsplash-image-m2TU2gfqSeE.jpg

Researching your audience whether you’re a service provider or a product retailer is a must. By identifying your customer demographics, you will be able to gear your merch products more specifically and ensure a successful launch.

When doing your research, you’ll want to follow these questions.

  • How old is your audience?

  • What are generally their interests?

  • What is the general socioeconomic status?

  • What is their employment industry?

The use of social media often can also be very revealing. Sometimes people aren’t that willing to share details over interviews or creating an account on your platform / store, or simply aren’t aware of their own habits.

Following your audience on social media can most often give you a very good idea of what they are into, this requires a lot of time but can be very rewarding.

Design

unsplash-image-wHddViTmSvA.jpg

After the research phase, design becomes the focus. It may be enough to add your logo to a cool gadget or a wearable good, but if you are looking to make a profit, adding an element of design can really bump up the interest in your merch. It’s necessary to try to make a statement by either creating a clever design or creating a product with a lot of color and character.

Some companies may hire an artist to create a work of art to be printed unto their merch, which makes those pieces a little more valuable than if it was just your logo or a simple component of your branding aesthetic.

Diversify Your Merch

unsplash-image-W6GMuGWSuEY.jpg

Not all merch is created equal, and not all merch is equally useful for everyone.

By diversifying the products offered, you’re giving the consumer a choice of products that best serves them. Your demographic according to your research may have different variants, this is when you should make the decision of creating different products for different people.

Anyone willing to buy merchandise is usually happy to browse a range of products and see what you have on offer, rather than only having the option to buy one thing. Happy merchandise consumers may also return to your online store to buy a different item next time, so having a choice is key.

Budget

unsplash-image-djb1whucfBY.jpg

Maximizing your budget can make all the difference. If you’re unable to offer a variety of products, concentrate on the product you think will perform the best according to your audience research.

Many brands will also launch a pre-order product(s) and can fund their merch production using this method as the purchase will be done upfront making it easier to increase your budget. While this works for most companies, we suggest you advise your customer of potential lead-times as printing and production times my vary.

Read more about What To Include In Your Promotional Products Budget

Fulfillment

IMG_0715.jpg

If your budget allows it, we recommend using companies such as Family Industries for all your fulfillment needs. The good thing about this process is that you will never have to touch the product, they will be made, printed, packed, and shipped all from a single source. Fulfillment can become overwhelming if you have a large following and a healthy stream of daily orders, and services like fulfillment can be a time-saver and allow for you to focus on your overall business.

Author: Irene Floridia - Content Creator


Follow us on Instagram and Facebook!

For FAQ, check out our site!

For any inquiries, send us a message!

OR

send us an e-mail at quotes@familyindustriesla.com

Finishes That Take Your Brand To The Next Level

Custom finishes can be the thing that sets your brand apart from your competition. These customizations can range from small and simple to being a little more involved and a bit more expensive. We think that investing in details is the best way to take your brand to the next level. In this article, we will go through all of the custom finishes available as well as comparisons and options for smaller budgets.


What Are Apparel Finishes?

Custom apparel finishes are collar tags, interior tags, screen printed logos inside the garments, price tags, as well as packaging. Most of what apparel finishes refer to are markers withing the garment that shows off your brand’s logo and other brand characteristics.

Check Out A Guide To Branding

Examples of Custom Finishes:

  • Neck Tags

  • Custom Woven Tags

  • Fold & Bag

  • Sticker Application

  • Brand Info Tags (hanging tags)

Why are apparel finishes important?

Creating a brand new tag on your shirt is an excellent way to promote a business’s brand. Imagine including your logo on every tag knowing that everyone will check to see the size. Customizing the tag allows everyone to see your logo and details about your business in a unique and effective way.

Every piece of clothing comes with a tag already printed and it is usually on the back of the neck. The tag’s purpose is to provide the wearer with all the relevant information they need to know about the garment. But imagine replacing all that with your company’s logo, brand, and info. This can build brand loyalty.

Check out Guide To Product Packaging & Labeling

Neck Tags

Neck tags or collar tags are the most common types of apparel finishes. Neck tags can either be woven or printed directly unto the garment.

Woven tags are a little more involved as these are separate pieces that need to be sown unto the garment, therefore, adding more steps to your finishing services. However, tags look more professional and you have more freedom to add color.

Printed tags are done directly unto the garment, these types of tags are easier and can be more cost-effective depending on the amount of units you or your local screen printing shop are producing. This type of finish is typically done in a single color, which is recommended to ensure a good rate from your screen printer.

If you are looking to place a tag on the sleeve or the bottom hem, woven tags will be your only option. These placements can make a big difference when done right, this is usually a premium service that is provided by a merchandise agency such as Family Industries.


Hanging Tags

When you add hang tagging to your custom apparel, it gives your garment a professional look that is ready for retail. All you need to provide is the info for the hang tagging and where you want to place it, then a merch agency such as Family Industries will take over the rest.

Hanging tags are generally applied to hi-end apparel and allows for you to include more information about your brand such as your mission statement, your logo, and any other branding elements. As a merch agency, we supply and print all custom tags in-house, as well as apply the tags to your apparel.


Packaging & More

Personalized packaging such as poly bags or box tape can also elevate your brand presentation. Little details can go a long way when presenting your product. These types of finishing services can be an added bonus when deciding to invest in your business.

As a merch agency, we always recommend adding your logo to the package either by stickers or printed unto whatever the surface may be such as a box or tape.

Stickers are the cheapest option if you are on a budget and adding more to the bag is also a good way to get your brand in front of other people and most customers like these details.

Check out Classy Ways to Use Stickers on Your Packaging

For a more economical way to add a personal touch, you can invest in a stamp of your logo. A stamp can be used in just about any surface which makes it easy to brand your packaging such as shipping boxes, tape, and packing paper or poly bags.

Author: Irene Floridia - Content Creator


Do you have more questions about premium merch printing?

send us an e-mail at quotes@familyindustriesla.com, or give us a call at 323.227.1547 and we'd be happy to help.

Our showroom at 2755 Fruitdale Street, Los Angeles, CA 90039 is open by appointment only from 10 am - 4 pm Monday through Friday.


Follow us on Instagram and Facebook

For FAQ, check out our site!

For any inquiries, send us a message!

OR

send us an e-mail at quotes@familyindustriesla.com